分类 VPS相关 下的文章

第一步,创建虚拟机。

第二步,登陆 SHELL,具体登陆方法自己探索。

使用 WinSCP 之类的软件把 img2kvm 和 IMG 镜像上传到 ROOT 目录,当然也可以使用 wget 命令下载到 PVE 宿主机。

img2kvm 下载地址:img2kvm.zip

  • 注:第二种方法无需 img2kvm。

第三步:IMG 转换

第一种:

chmod +x img2kvm
 ./img2kvm LEDE.img 101 vm-101-disk-1 local-lvm

上面2个101是虚拟机的VM ID, LEDE.img是需要引导的img文件,local-lvm是你的存储ID

第二种:

qemu-img convert -f raw -O qcow2 <firmware_name> <output_diskname>
#例子:qemu-img convert -f raw -O qcow2  LEDE.img vm-101-disk-1.qcow2
qm importdisk <vmid> <source> <storage>
#例子:qm importdisk 101 vm-101-disk-1.qcow2 local-lvm

第四步:登陆管理页面,加载磁盘

打开刚才创建的虚拟机的硬件,会看到有个未使用的磁盘,双击打开,点确认即可。
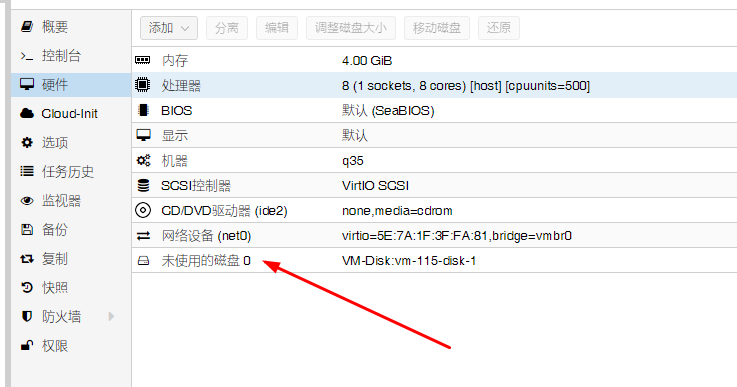
1.png

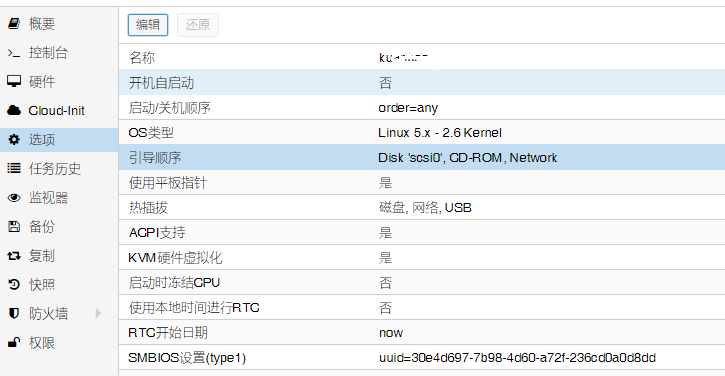
对应编辑一下引导顺序。
2.png
转自:https://vzone.me/913/

查看CPU支持的模式

[root@lxtxtech ~]# tuned-adm list
Available profiles:
- accelerator-performance     - Throughput performance based tuning with disabled higher latency STOP states
- balanced                    - General non-specialized tuned profile
- desktop                     - Optimize for the desktop use-case
- hpc-compute                 - Optimize for HPC compute workloads
- intel-sst                   - Configure for Intel Speed Select Base Frequency
- latency-performance         - Optimize for deterministic performance at the cost of increased power consumption
- network-latency             - Optimize for deterministic performance at the cost of increased power consumption, focused on low latency network performance
- network-throughput          - Optimize for streaming network throughput, generally only necessary on older CPUs or 40G+ networks
- powersave                   - Optimize for low power consumption
- throughput-performance      - Broadly applicable tuning that provides excellent performance across a variety of common server workloads
- virtual-guest               - Optimize for running inside a virtual guest
- virtual-host                - Optimize for running KVM guests
Current active profile: throughput-performance
[root@lxtxtech ~]#

设置高性能模式

[root@lxtxtech ~]# tuned-adm profile throughput-performance
[root@lxtxtech ~]#

设置省点模式

[root@lxtxtech ~]# tuned-adm profile server-powersave
[root@lxtxtech ~]#

查看当前模式

[root@lxtxtech ~]# tuned-adm active
Current active profile: throughput-performance
[root@lxtxtech ~]#

安装了PVE,会发现系统默认把空间分成了Local、Local-LVM两部分,这样的话对于像三角云、星际蜗牛这样的矿渣来说安装好了控件不是特别够,所以需要把两部分控件合并起来,具体操作如下:
1、备份虚拟机(如果是全新安装,则省略这一步)
2、删除虚拟机(如果是全新安装,则省略这一步)
3、删除local-lvm

root@pve:~# lvremove pve/data
Do you really want to remove and DISCARD active logical volume pve/data? [y/n]: y
  Logical volume "data" successfully removed
root@pve:~#

4、扩展Loacal,把删除的Local-LVM控件扩展给Local


root@pve:~# lvextend -l +100%FREE -r pve/root
  Size of logical volume pve/root changed from 96.00 GiB (24576 extents) to <550.23 GiB (140858 extents).
  Logical volume pve/root successfully resized.
resize2fs 1.44.5 (15-Dec-2018)
Filesystem at /dev/mapper/pve-root is mounted on /; on-line resizing required
old_desc_blocks = 12, new_desc_blocks = 69
The filesystem on /dev/mapper/pve-root is now 144238592 (4k) blocks long.

root@pve:~#

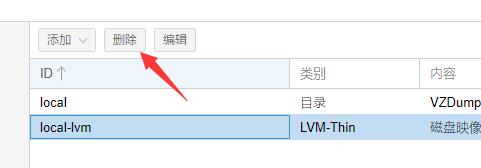
5、PVE页面删除Local-LVM储存
QQ截图20200902094808.jpg
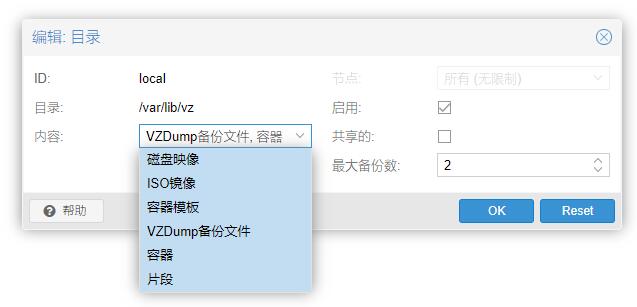
6、编辑Local,内容全部打上勾
QQ截图20200902094938.jpg
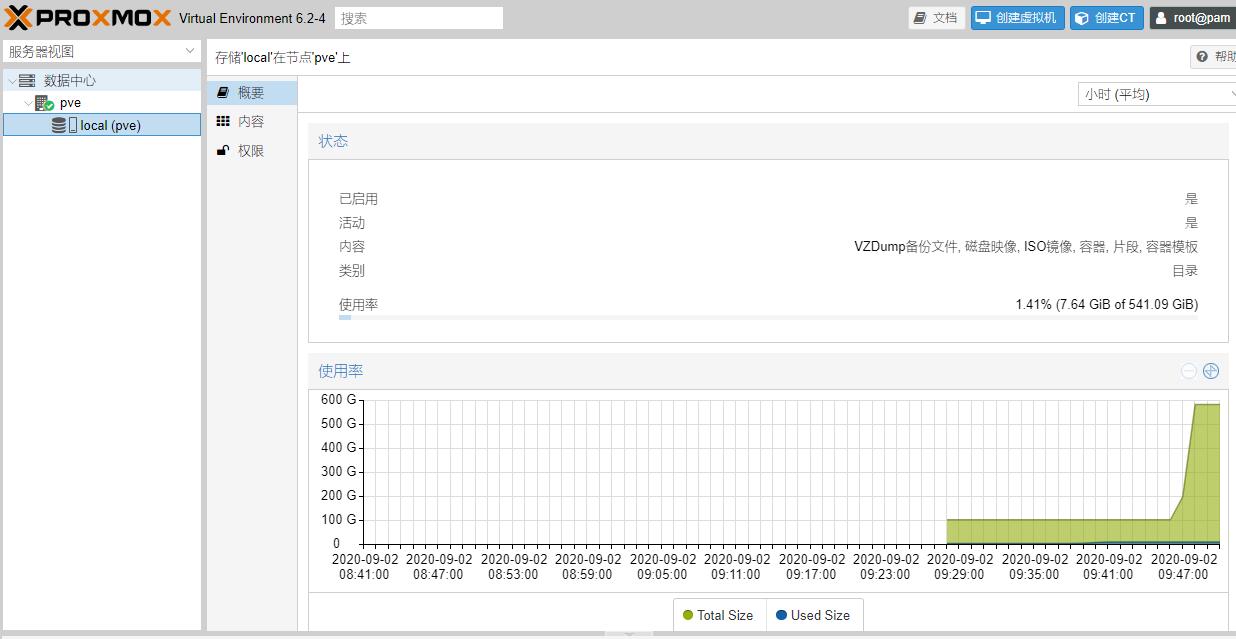
7、搞定
QQ截图20200902095036.jpg
8、恢复虚拟机(如果是全新安装,则省略这一步)

1、更换PVE国内源

# 删除企业源
rm -rf /etc/apt/sources.list.d/pve-enterprise.list
#下载秘钥
wget http://download.proxmox.com/debian/proxmox-ve-release-6.x.gpg -O /etc/apt/trusted.gpg.d/proxmox-ve-release-6.x.gpg
# 添加社区源
echo "deb http://download.proxmox.wiki/debian/pve stretch pve-no-subscription" >/etc/apt/sources.list.d/pve-install-repo.list

2、添加debian国内源

nano /etc/apt/sources.list.d/pve-install-repo.list
#添加以下内容
deb http://mirrors.aliyun.com/debian/ buster main non-free contrib
deb-src http://mirrors.aliyun.com/debian/ buster main non-free contrib
deb http://mirrors.aliyun.com/debian-security buster/updates main
deb-src http://mirrors.aliyun.com/debian-security buster/updates main
deb http://mirrors.aliyun.com/debian/ buster-updates main non-free contrib
deb-src http://mirrors.aliyun.com/debian/ buster-updates main non-free contrib
deb http://mirrors.aliyun.com/debian/ buster-backports main non-free contrib
deb-src http://mirrors.aliyun.com/debian/ buster-backports main non-free contrib

3、更新pve

apt update&& apt upgrade -y

    最近在github上面发现大佬写了个Linux VPS一键安装桌面及远程桌面的脚本,就用服务器试了一下,感觉还可以,所以拿来分享下。
    GitHubdi地址:

https://github.com/MeowLove/Linux-Remote-Desktop-Environment

    程序对性能要求比较高,内存和CPU占用比较大:

CPU core ≥ 1, Memory ≥ 1GB, Disk space ≥ 15GB.

    安装脚本:

#下载脚本
wget --no-check-certificate -qO ~/Linux-Remote-Desktop-Environment.sh 'https://raw.githubusercontent.com/freehao123/Linux-Remote-Desktop-Environment/master/Download/Common/Load/Linux-Remote-Desktop-Environment.sh' && chmod a+x ~/Linux-Remote-Desktop-Environment.sh
#CentOS 7+安装
bash ~/Linux-Remote-Desktop-Environment.sh -CentOS
#Debian 9+安装
bash ~/Linux-Remote-Desktop-Environment.sh -Debian
#Ubuntu 18.04+安装
bash ~/Linux-Remote-Desktop-Environment.sh -Ubuntu

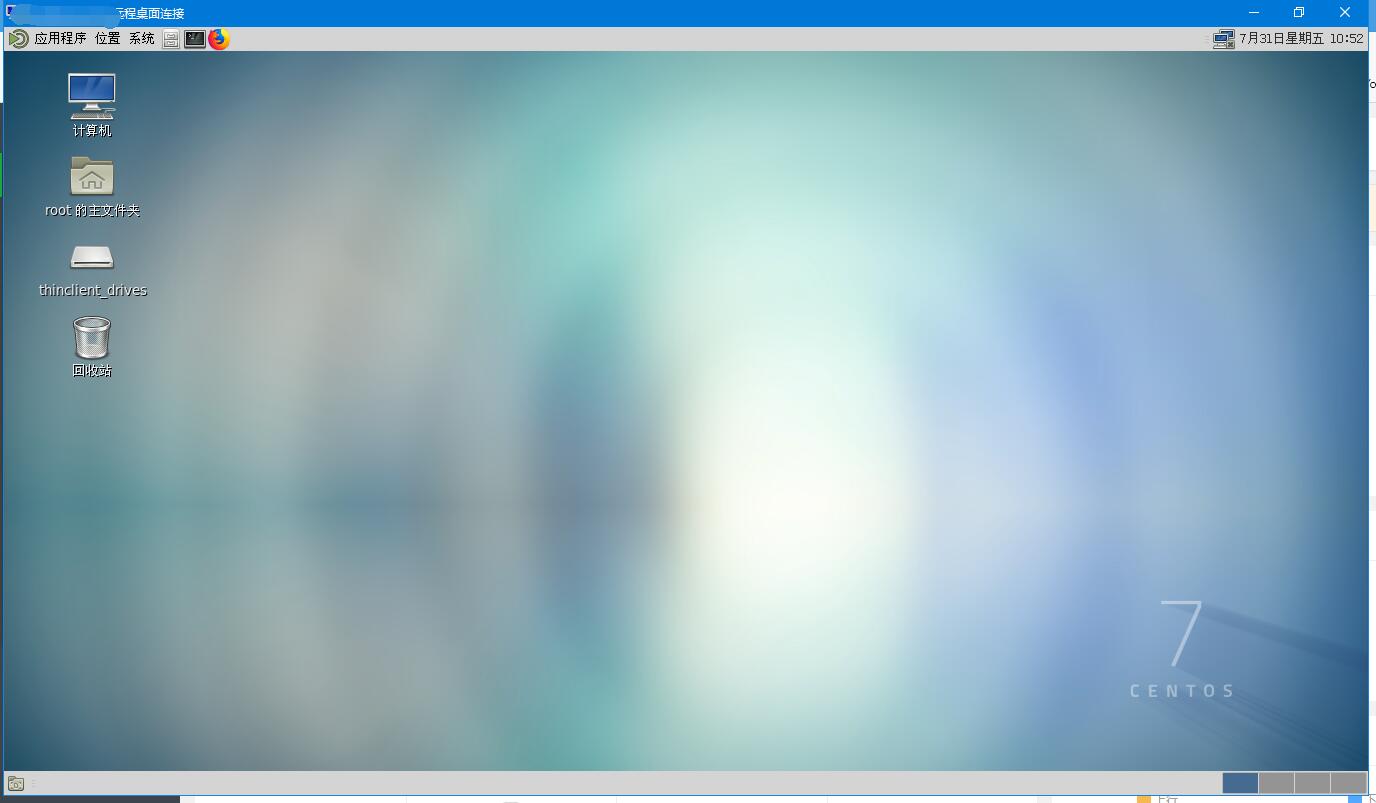
    安装完成后,会显示创建的登录名和密码,然后就可以用RDP连接了,这里我用的是Windows自带的远程桌面程序:
TIM截图20200731105255.jpg